KML stands for Keyhole Markup Language and is a file format used to store and display geographic information, such as latitude and longitude coordinates, annotations and visualizations on two-and three-dimensional maps. KMZ is a Zip-compressed KML file; therefore it’s more typically used in MetroQuest as it requires less space.
Using a KMZ layer can be incredibly valuable in the Map Marker or Project Selection Screens in MetroQuest as they can visually indicate your study area, past or present project areas, potential future projects, or any other valuable information that could be overlaid on a map. You could make a layer of existing bike paths, high traffic areas, major accident zones, or anything else you can imagine using simple tools.
To create a KMZ from scratch, you can use Google Earth Pro. The download is free, and it uses the same map information as Google Maps, which is the base Map for all MetroQuest Surveys.
KMZ Limits
MetroQuest uses Google Maps as our base map layer, and the KMZ is uploaded into that system, which means there are maximums and limitations to what can be added.
As per google maps (https://developers.google.com/maps/documentation/javascript/kmllayer), the maximums are:
- Maximum fetched file size (raw KML, raw GeoRSS, or compressed KMZ): 3MB
- Maximum uncompressed KML file size: 10MB
- Maximum number of total document-wide features: 1,000
To reduce either of these, try reducing the number of items or combining items if possible. Make sure there are only simple items within your file (i.e. no secondary KMZ or KML within your folder that will become part of your new KMZ).
Helpful Tips
- If you’re creating a line or shape and decide you aren’t happy with it and want to start over, just hit the “Cancel” button in the pop-up window for that item.
- The more points you add, the more detailed a shape will be, but it will also take longer to load for your participants. Use as few points as possible in both lines and polygons.
How to create your folder
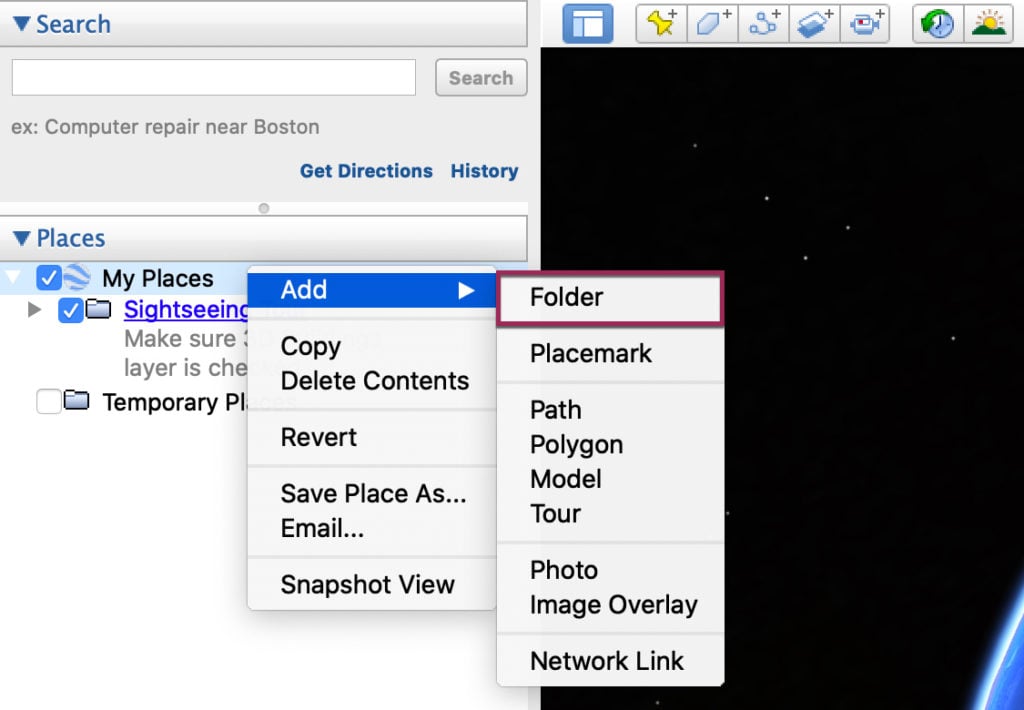
Once you are in Google Earth Pro, you’ll need to start a folder to contain all of the items that will be contained in your KMZ. In the left-hand menu, you will see a white section under the heading “Places”.
- Right-click on the item My Places
- Add → Folder
- In the popup that appears, change the name appropriate for your project.
- Click OK
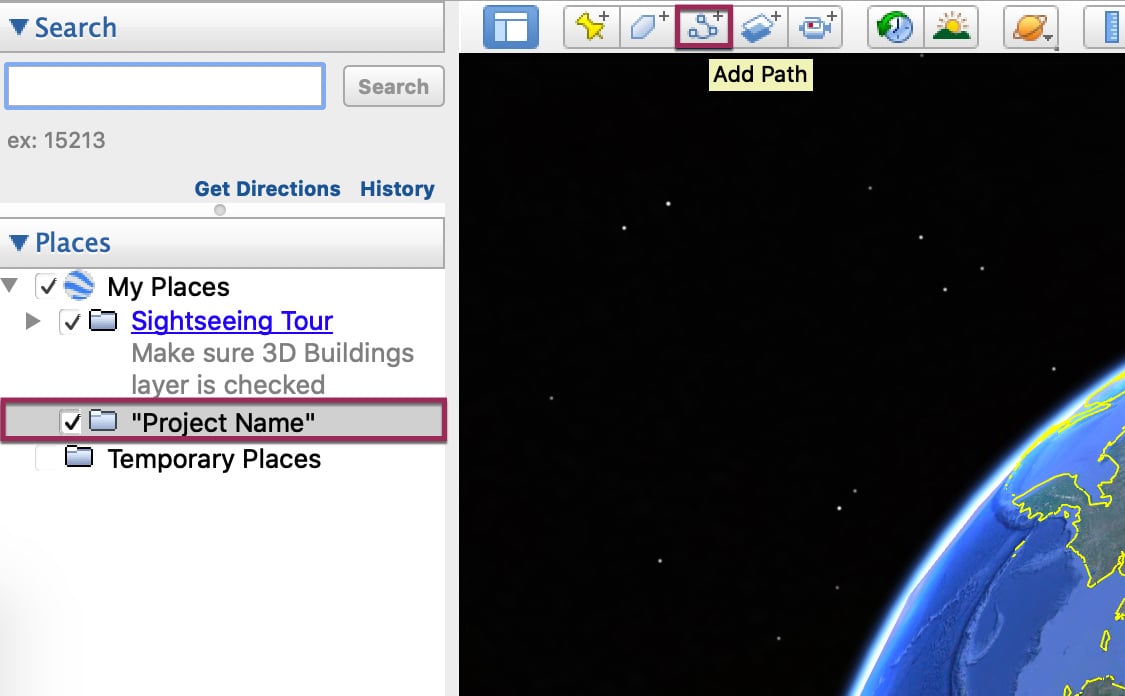
How to create a line
With your new folder highlighted, you can now start creating lines and shapes. Let’s start with a line.
- Click the Add Path button in the top menu above the map.
- Once you have selected this, a new popup window will appear that has details about the path you’re going to create. Add a name to label this specific line.
- Move your cursor over to the map and click on a point to start your line. As you click to create more points, a line will join them together.
- To change an already-created point, click and drag it into position.
- To remove a point, right-click on it.
- Try not to add too many points as it could create a slow loading experience on slower internet connections for your participants.
- Once your line is in the correct shape, you can change its color and width. In the popup that you named the line in, look for the Style, Color tab, and click on it.
- Click on the Color icon to choose any color or enter a hex code.
- Change the width, and make sure you zoom in and out to see how it appears from different zoom levels. If you are starting your map view at a more zoomed-out scale, the line may look different.
- When you are satisfied with your line’s appearance, click OK to save your progress.
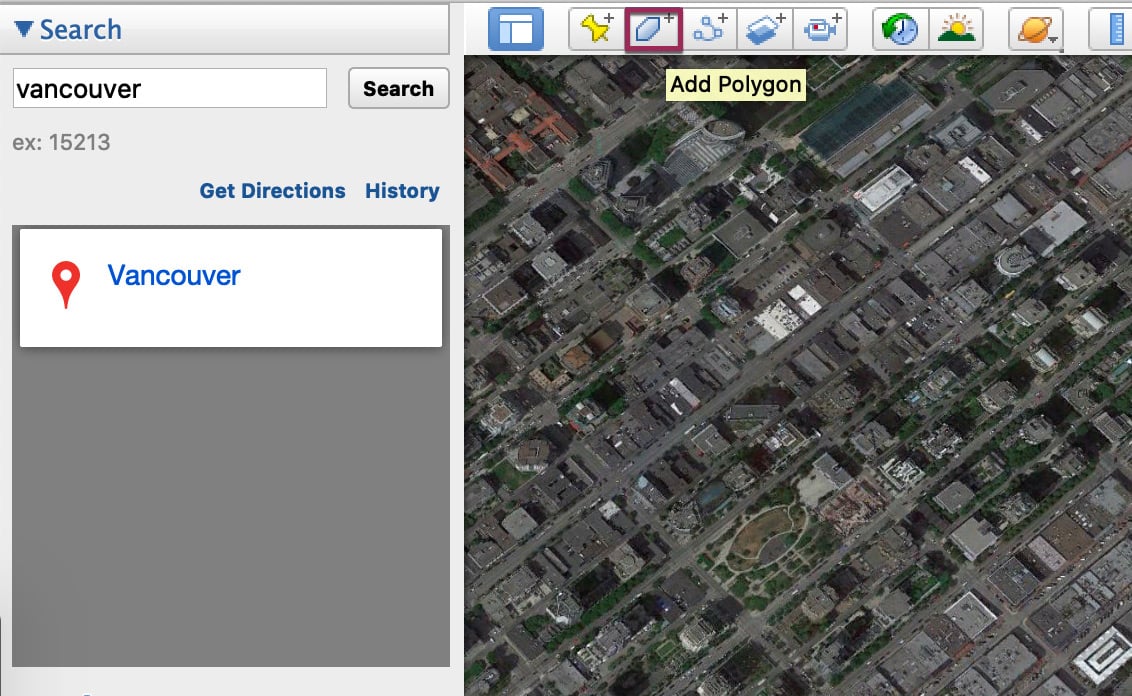
How to add a shape or polygon
To add a shape or polygon instead, the tool is very similar.
- Choose the Add Polygon tool in the upper menu, just to the left of the Add Path button.
- In the pop-up window, name your new shape.
- Click on the map to create points that will define your shape. The shape will fill in as you add more points.
- Use the Style, Color tab to change the line colour, fill colour, and line width of the shape.
- Click OK to save.
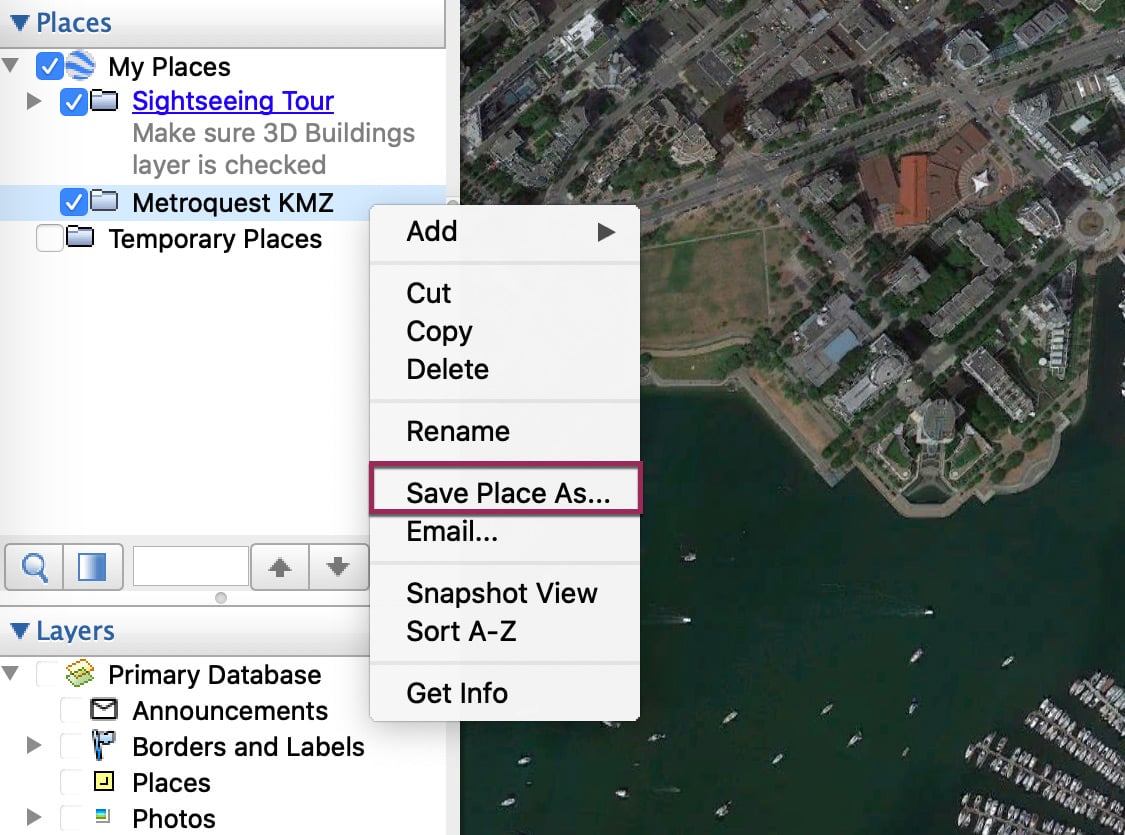
Once you have all your shapes and/or lines created, you’re ready to save your KMZ. These items must be saved as all one file to be uploaded into MetroQuest, so you will be saving from the folder you created at the beginning of this process.
Right-click on the folder name and choose *Save Place As. From here you can name your file and save it to your computer, then upload it into MetroQuest on the appropriate screen.
If you have multiple lines and shapes, please make sure they are under one parent folder and save the parent folder.
If you have any questions about this process, contact the Support Team at support@metroquest.com