The downloadable Screen Data for the Map Marker Screen showcases markers along with their latitude and longitude coordinates, making it a perfect format for importing into both ArcGIS and Google My Maps.
ArcGIS
- In Data Center, navigate to the Map Marker Screen and click on the "Screen Data” to download an excel sheet that includes all marker details with latitudes and longitudes for entry into ArcGIS.
- Before importing the Screen Data into the Google My Maps application, please reformat the Screen Data.
- You will use the "All Mappings" tab to export your Map Marker Data to Google My Maps application. To do this, rearrange the tabs so that that "All Mappings" is the first sheet.
- Please delete Row 1 that reads "File contains all data collected as of Month-Date-Year XX:00:00-UTC. All data reported in UTC. Click the Refresh button in Data Center to download the latest dataset". This is to ensure all headers, including VisitID, VisitTime, SiteVisited, Marker, Latitude, and Longitude, are on Row 1.

- For quick upload into ArcMap, choose File, Add Data, Add XY Data. Use the Browse tool to find the downloaded Screen Data, and open the second tab labeled All Map Markers.
- Specify the X field as Longitude, and the Y field and Latitude.
- Ensure the Coordinate System is set to WGS 1984.
- Save the new layer as a shapefile to be shared or applied to other maps by right-clicking on the layer, and choose Data, then Export Data.
Google My Maps
Before importing the Screen Data into the Google My Maps application, please reformat the Screen Data.
- You will use the "All Mappings" tab to export your Map Marker Data to Google My Maps application. To do this, rearrange the tabs so that that "All Mappings" is the first sheet.
- Please make sure all headers, including VisitID, VisitTime, SiteVisited, Marker, Latitude, and Longitude, are on Row 1.
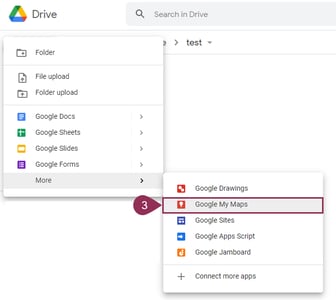
- Log into Google Drive and click "New" in the top left corner. In the menu of new file types that appears, click "More" and then "Google My Maps."
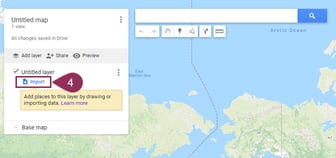
- In the new "Untitled map" that appears, click on the "Import" button in the left side menu, underneath the "Untitled layer" title.
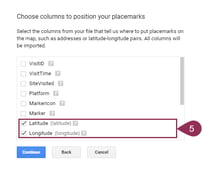
- Upload the downloaded Screen Data. Google will prompt you to select the columns for Latitude and Longitude.
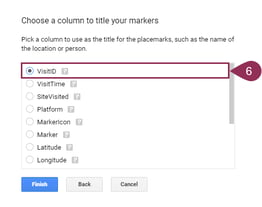
- Use VisitID to title the marker.
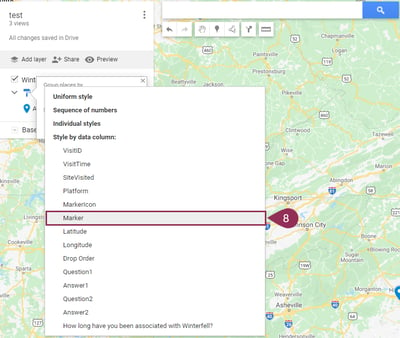
- Once the layer is uploaded, all markers appear with the same icon style and color. To change this, click on the "Uniform style" blue text underneath the layer title in the lefthand menu.
- In the "group places by" menu, choose "Marker"
- All markers now appear color-coded, and users can adjust the marker image and color to match their needs for each marker type.